So it's back to the inside of the Architect's Loft for this post and more importantly, it's on to lighting the loft! As mentioned in a previous post, the lowly suction cup became the basis for our light fixture.


This was some of the ideas we found online that we liked.


I wasn't sure that the lights should hang on chains or just the wire, I didn't think it would hang straight on either though, so I decided to use copper tubing (hence my visit to the hardware store to get the pipe cutter that ended up in me buying waterline tubing for the handrail!!).
We painted the suction cups with Gesso and then I painted mine in a copper finish. The lengths of the pipes varied depending on the location of the light. In total I added 6 lights. The pipes are still brass colored here, but I painted them to match the copper lamps. Sorry the Architect had an accident on the steps, we're hoping that he'll be okay in the morning.
As mentioned in the last post the wires from the lamps run from the ceiling down the outside to the base. Here's a great shot of the wires from Lisa's Pottery Studio. We channeled grooves in the Gatorboard to accept the wires and covered them in painter's tape before we bricked over the wall. Since Gatorboard has a hard plastic coating, it was challenging to get these grooves added.
Once the wires get down to the base, they are plugged into a Houseworks Power Strip
This Power Strip takes 12 plugs, which is more than I needed. But I only had a 12 plug or three plug. I may try and replace it with two 3 plug. But I'm also thinking I'd like to add a drafting board lamp and a lamp on the furniture I'll be building for upstairs, so for now I'll leave the 12 plug strip there. It's buried in the base, behind the trash in the "alley"
Lisa painted her suction cups metallic white shown here. You can see here that we drilled a hole in the middle of the suction cup and threaded the wire of the light through this hole.
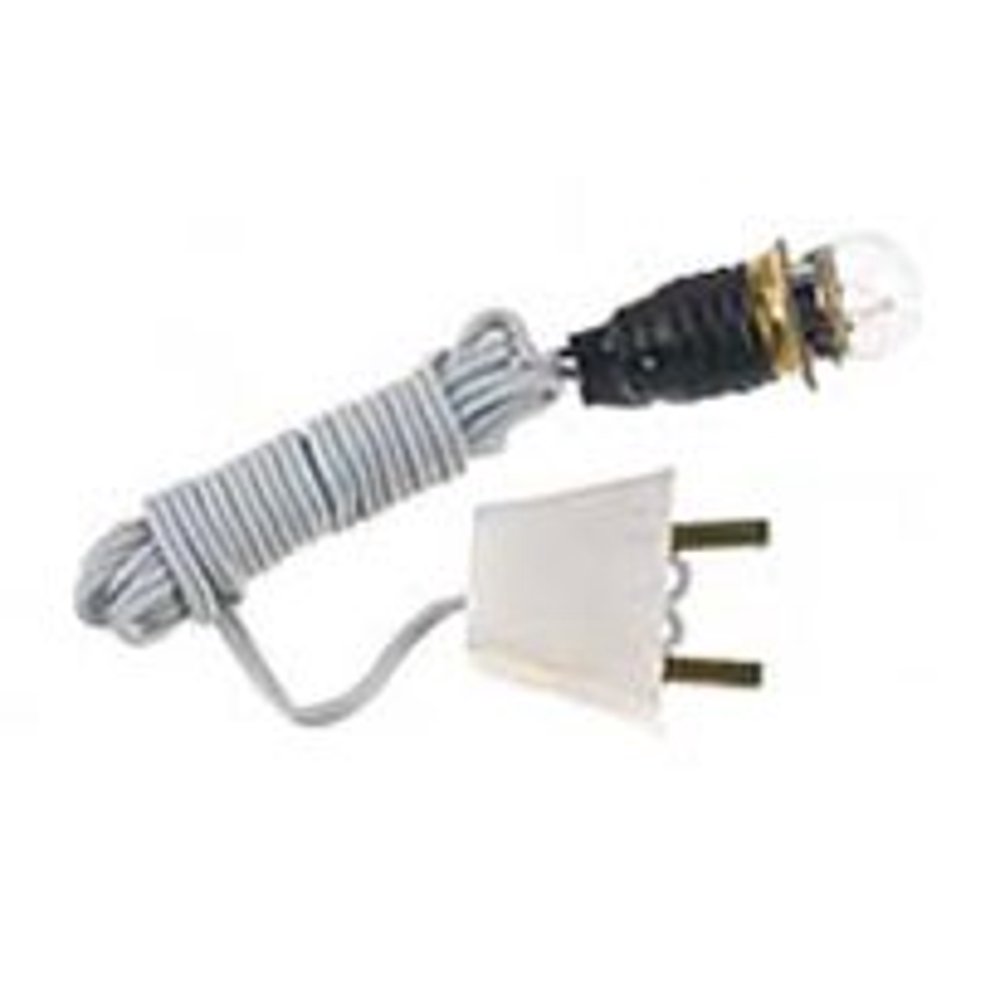
I used the Houseworks screw-base bulb and socket for my light fixtures.
All the lights are completed here, the staircase and newel posts are in place as well.
The ceiling is propped into place, so I now have to think of how I will finish the roof and the edge of the ceiling/roof.
Here's everything lite.


For extra stability I also added two wood columns, one under the second floor and one tall one under the second floor ceiling.
You can also see the ductwork I added. It's made from the large bendable straws sold at dollar stores, with a cord wrapped around it to mimic the look of the duct pipes. Then the straws were painted with Gesso and the the same metallic copper used on the lights.
The ductwork continues down to the first floor.
So the staircase and the lighting is now completed on the inside. To see close up pictures click on the images to see larger versions.
I still have to build more furnishings and accessories for the inside, but for now, I'm moving back outside the loft again. I need to finish the "trash" and I need to finish the base. Check back for the next post to see what's happening outside.
Until the next time......
Wanda


.jpg)


Thanks to your clever finishing the suction cup lighting fixtures look amazing! Industrial and vintage at the same time. I love the exposed pipe, too, and the way you've disguised the power strip is ingenious! I am not sure if it will work on gator board, but I used this chisel on my MDF kit to create wiring channels and it worked like a dream. Might be helpful to you in a future project? https://www.amazon.com/gp/product/B089766T23/ref=ppx_yo_dt_b_search_asin_title?ie=UTF8&th=1
ReplyDeleteJody, again thanks for the kind comments. Love the chisel, never even thought of using a wood chisel to grove the gatorboard. It might have worked. I do have wood chisels here, but they aren't great quality, but I'm going to test it on a piece of scrap gatorboard to see for future use.
Delete