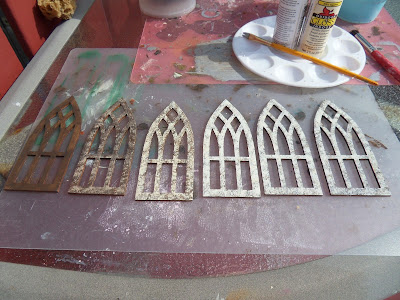
Castle Window Frames
It's another beautiful day in my city and I thought I would get another sponge coat on the castle outside on the patio. Unfortunately, it may be nice and warm, but the wind was still a little too strong for a roombox made from foam. I managed to get one coat on everything before I gave up on the effort, my trays of paint kept flipping over in the wind!
So I took a little break from the castle wall and started on the window frames. I had purchased the window frames at Camp in 2010 from Grandpa's Dollhouse. They're laser cut with the usual burnt edges you find on most laser cut wood. Last weekend I had put a base coat of Raw Umber on all the frames.
Today I started "sponge" painting the frames with the same colours as the walls. Since the frame pieces are so small I decided to use a stencil brush instead of a sponge. I had used the stencil brush in the tight corners of the castle walls and it blended well with the sponge painting.
To show you the layers of colour, here's the six window frames in each layer from Raw Umber to Fawn to Buttermilk to Eggshell and finally two coats of matte clear coat.
Here are two closeups. The first two layers.
The second two layers
After that it was the clear coats. Here are the five bottles I used.
Everything is drying nicely. Tomorrow it's supposed to rain, so it's a day in the craft room. I may get the final sponge coats on the walls. I also have to start to dress the inside of the turret before I make the final assembly to the castle. Lighting is also the next step.
Thanks for everyone's feedback, it's so appreciated.
Until the next time.....
Wanda


Fantastic project!!
ReplyDelete; )
Hello Wanda,
ReplyDeleteThe windows are great. I like the finish you applied. Well done.
Big hug,
Giac